The Craft Behind a Handmade Bracelet, Part 2 | Ken Hunt
Read Part 1: It Starts on Paper
The Metal and the Marks
We work in 100% sterling silver sheet, cut precisely to width and length. Before a tool touches it, each blank goes to the London Assay Office for hallmarking. You’ll find the full set of British marks plus KCH, the maker’s mark chosen to honour Kenneth Charles Hunt.
Hallmarking at this stage isn’t just legal compliance; it’s housekeeping. It means the silver has been independently tested and certified, and it fixes authorship from the outset.
Engraving: two paths, one standard
There are two ways we cut a design, depending on the commission:
Hand engraving
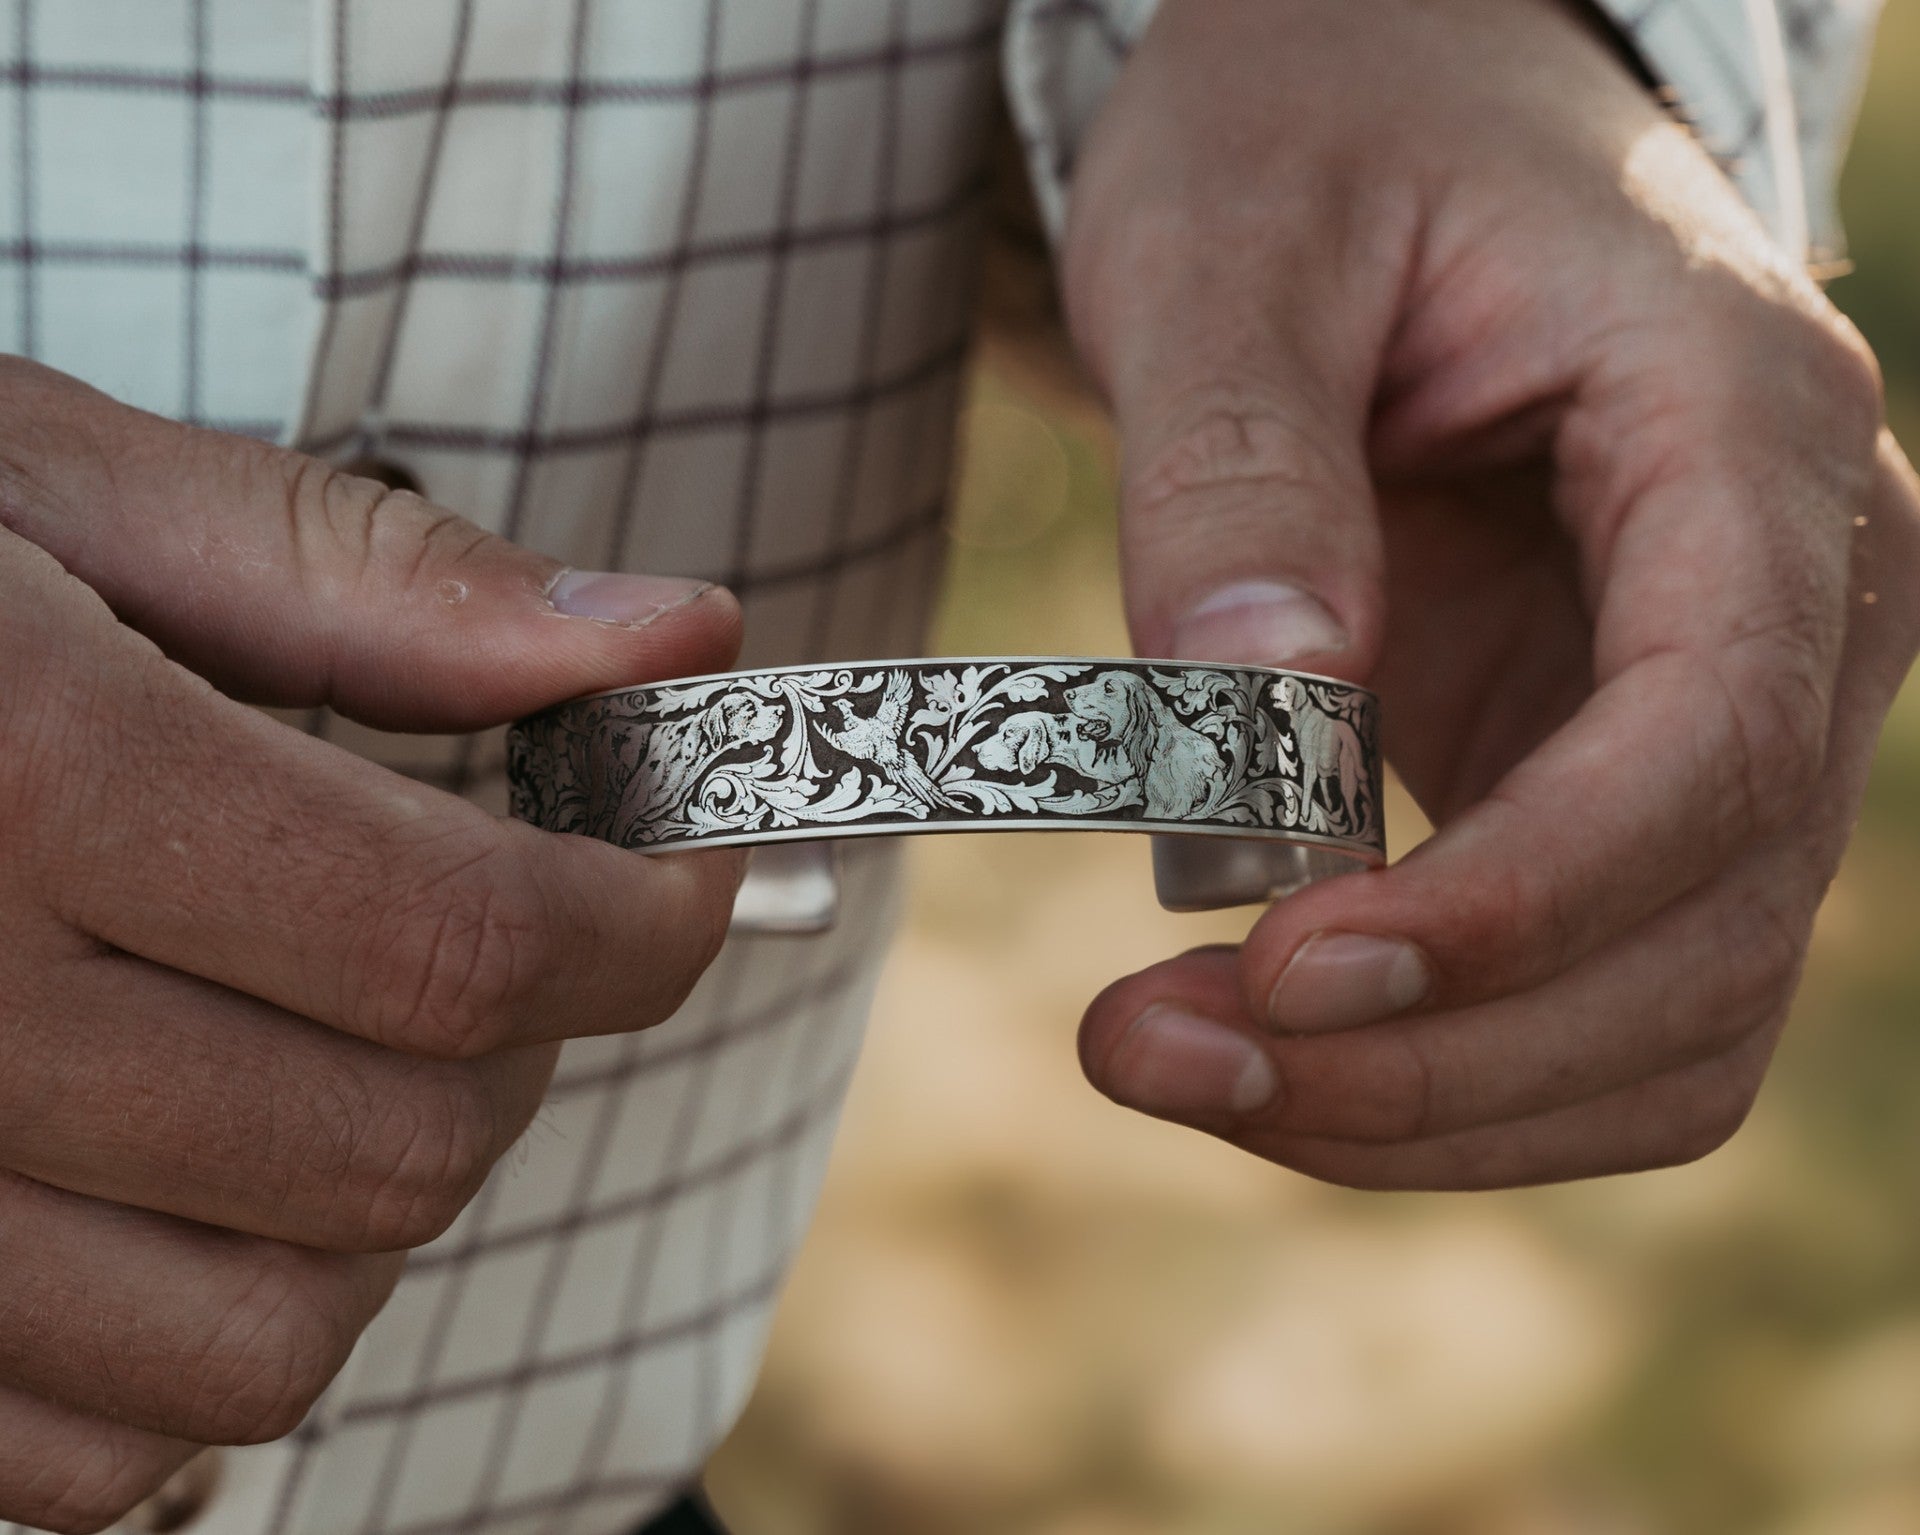
For bespoke work and personal touches, Marcus (Ken’s son) cuts directly into the silver with traditional tools. This is the same hand and eye that would work a Purdey or a Westley Richards action. Hand-cutting adds a natural chamfer and a particular sparkle to line edges that connoisseurs will notice immediately.
Laser engraving tuned by Ken
For our core patterns, we use a fibre laser. The key is that Ken has designed specifically for the laser’s behaviour: a clean, almost 90-degree wall, crisp terminations, and shading expressed as micro-relief rather than feathered bur.
We spent months learning how the beam holds contrast, which textures trap the ink best, and where to leave the metal untouched so the scroll lifts.
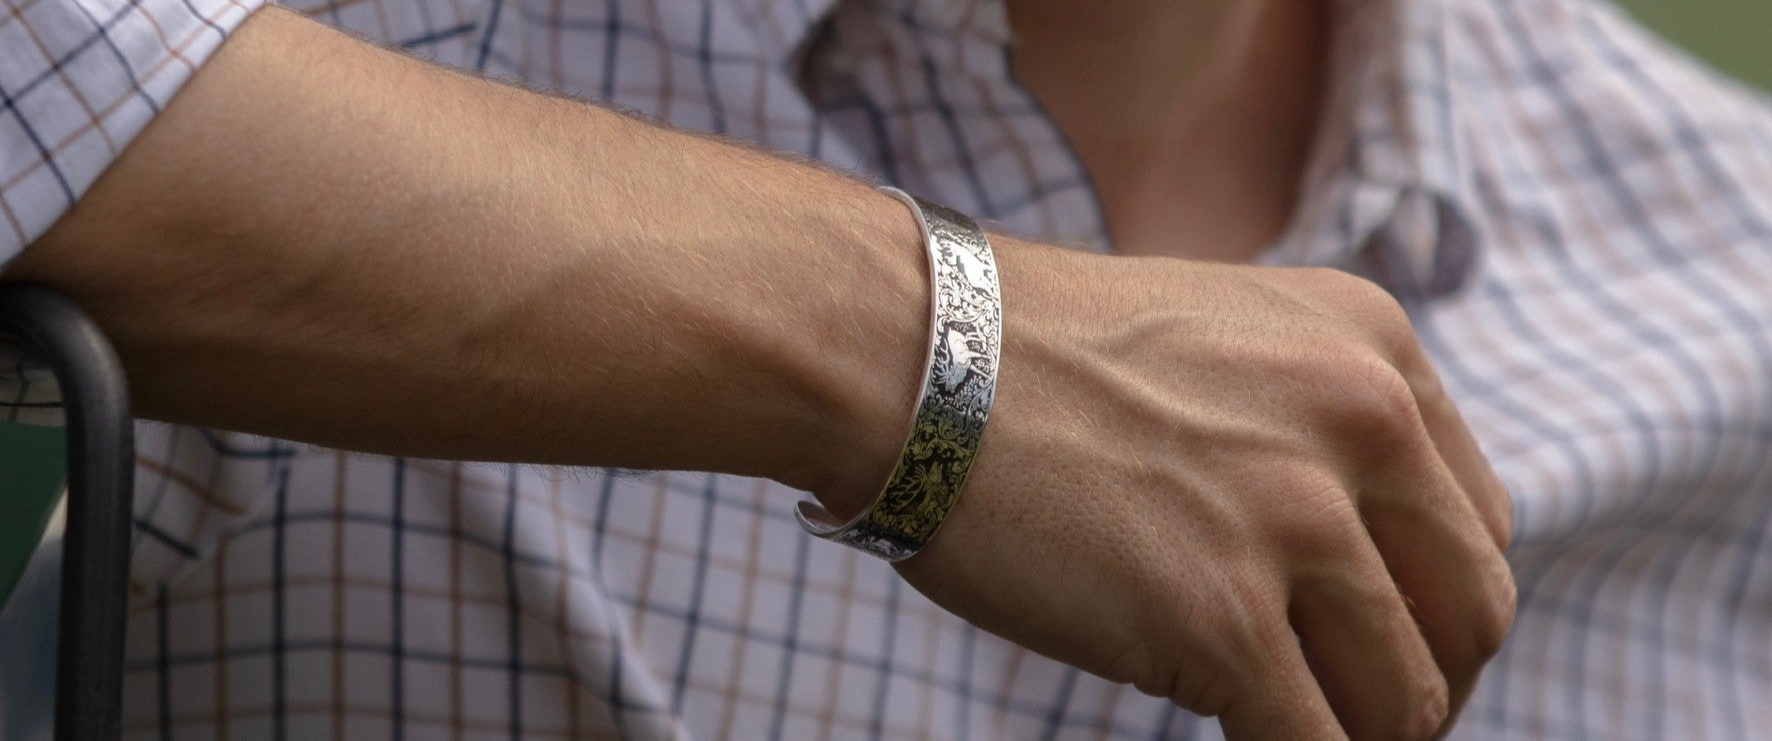
The upshot is fidelity, the bracelet reads at arm’s length and still rewards a nose pressed close. It also means we can offer a serious piece of engraving without months of waiting.
Both routes share a standard: depth you can refinish. We cut deep enough (typically up to roughly a quarter to half a millimetre on the main lines) that the surface can be re-sanded and re-polished years later without flattening the art. Longevity is part of the goal, not an afterthought.
The Quiet Hours: Sanding
After engraving, the work begins to look like a bracelet, but it doesn’t yet feel like one. Edges are sharp, surfaces carry machining marks, and the piece is still flat. We start with hand sanding, 400, then 800, then 1200 grit to soften edges and clear micro-burrs. This is not a five-minute tick-box. Expect 30–45 minutes of patience per piece to reach the best result.
The aim is to keep every arris intentional: no thin spots, no washed detail, no comfort bought at the cost of character.
First polish
The first round on the buffing wheel brings the silver up from dull to promising. Fifteen to twenty minutes here removes sanding haze and reveals any sins we’ve missed, a tiny scratch, a faint flat on an edge, a pin of porosity in the sheet that wants attention. We correct them now. The polish is a test as much as a finish; it shows you what you really have.
Forming on the mandrel
Up to this point the bracelet is still a rectangle. Now we form it by hand on a wooden mandrel, working with a nylon mallet. Wood and nylon matter: they move the metal without marking it.
In five minutes you’ll see the curve appear; in ten you’ll feel the oval settle into the natural shape of a wrist. This is where production parts and made pieces part company. We do not form to a jig. We form to how a human wrist wears a bracelet, slightly oval, pressure distributed, no hard points.
The bracelet should look like it grew into its shape, not like it was forced.
Second polish
Another five to ten minutes refines the surface, rebuilds the sheen and prepares a clean ground for contrast. If the piece is bound for gold plating, this is the stage we send it to Hassan Garden (London). Their work gives us a durable, even deposit that takes ink beautifully and wears gracefully.
Bringing the art forward: contrast in the background
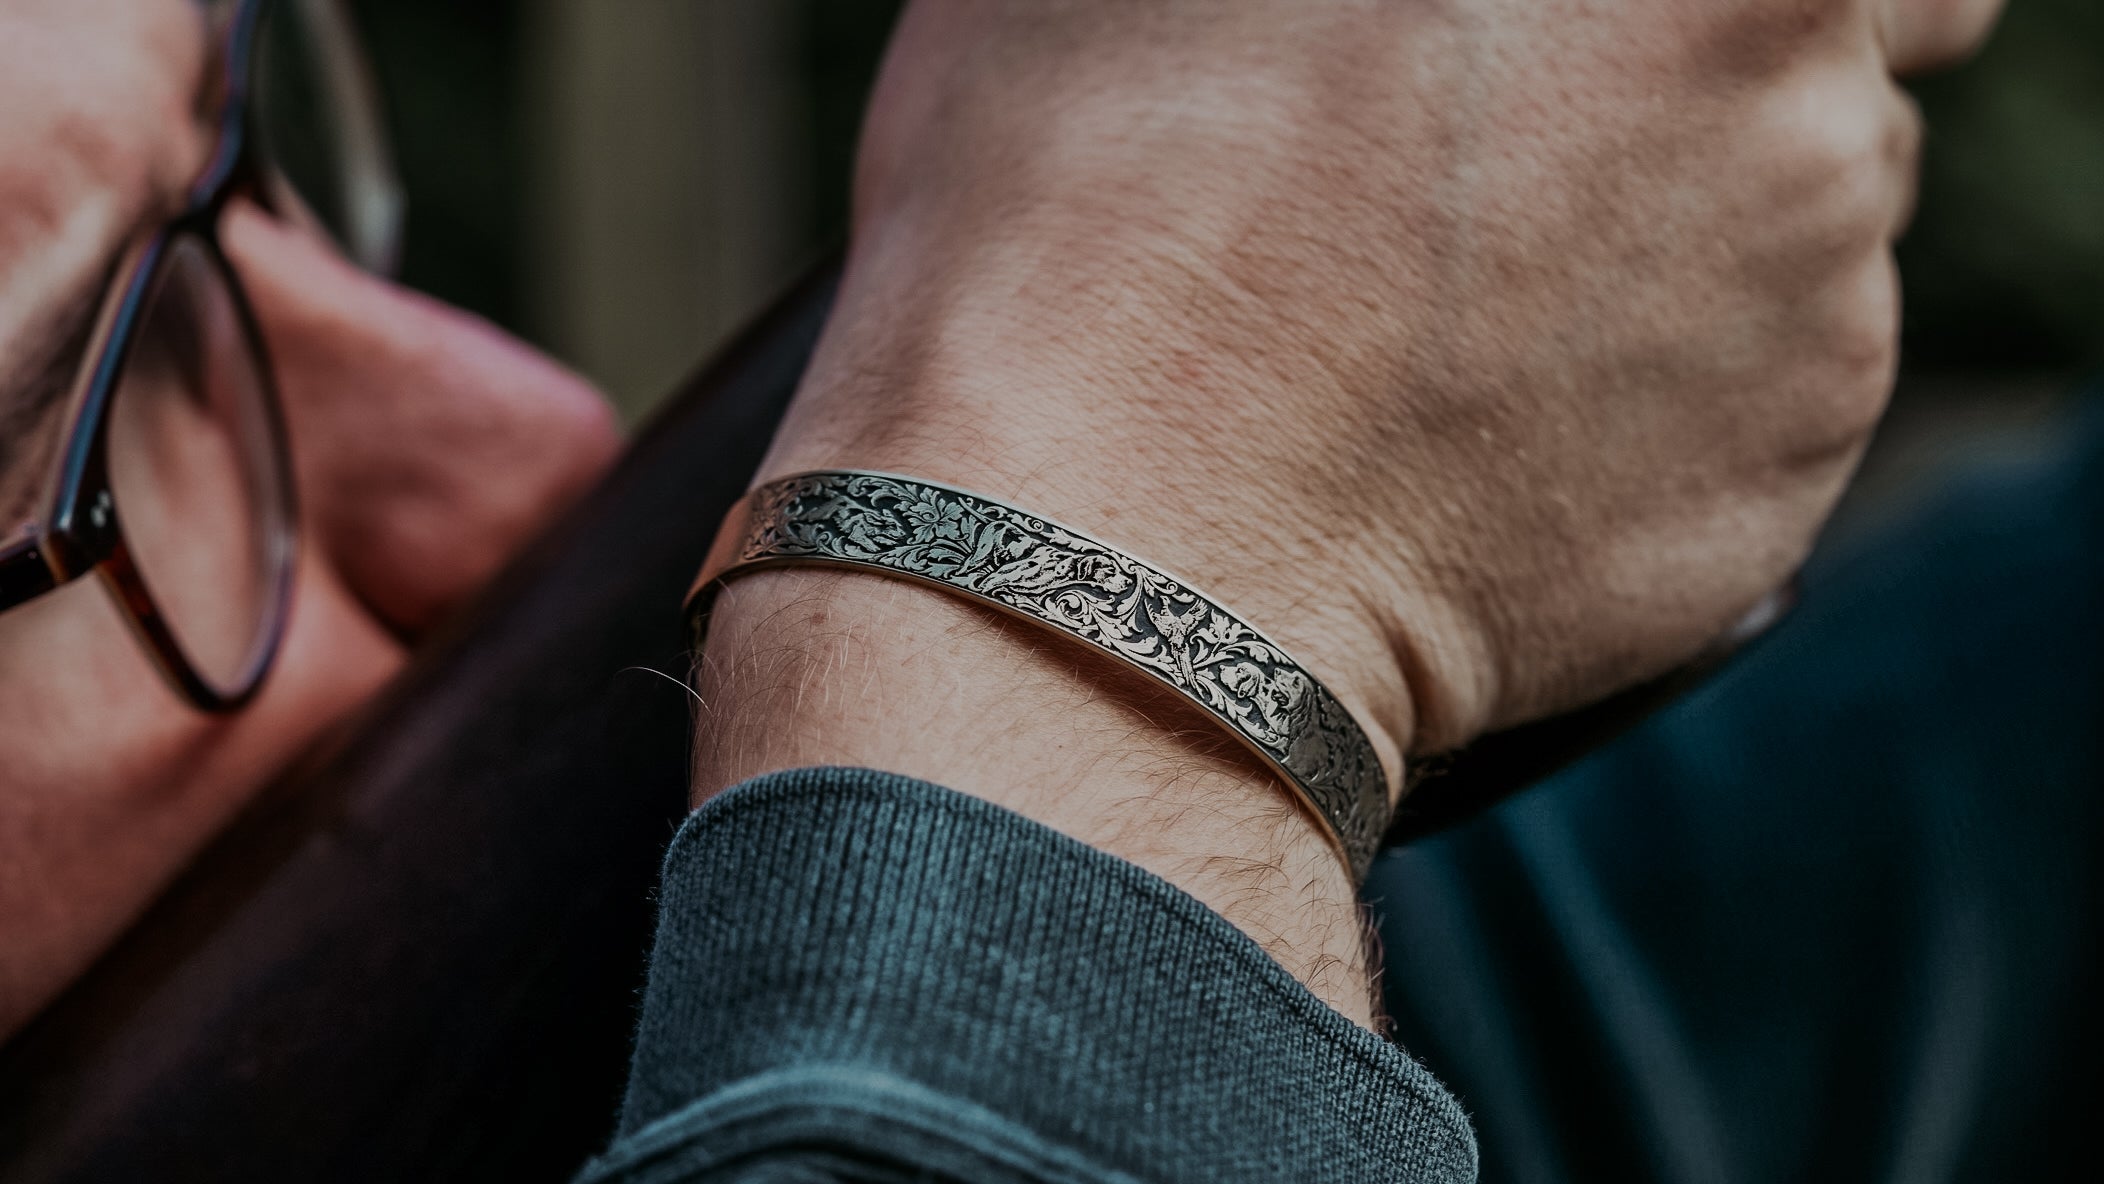
Engraving is relief, and relief wants contrast. We use a specialist industrial metal ink to darken the background and let the foreground lift. Application is simple in theory and fussy in practice: ~10 minutes to apply a coat, then ~30 minutes to let it cure, repeated three to five times depending on how the metal takes it. Silver, with the tooth left by engraving and sanding, takes ink readily. Gold is more stubborn, chemically inert and smooth, so it needs patience and layering. Done well, the background goes satin-dark, the scroll stands clean, and the whole surface gains depth without looking painted.
Bringing the art forward: contrast in the background
Engraving is relief, and relief wants contrast. We use a specialist industrial metal ink to darken the background and let the foreground lift. Application is simple in theory and fussy in practice: ~10 minutes to apply a coat, then ~30 minutes to let it cure, repeated three to five times depending on how the metal takes it. Silver, with the tooth left by engraving and sanding, takes ink readily. Gold is more stubborn, chemically inert and smooth — so it needs patience and layering. Done well, the background goes satin-dark, the scroll stands clean, and the whole surface gains depth without looking painted.
Personalisation: when the piece speaks your name
We can add a personal inscription on the inside while the bracelet is flat (laser) or once it’s formed (hand-cut by Marcus). A date, a monogram, a line from a letter, the sort of things people used to put in signet rings and cigarette cases. Depth and spacing are treated with the same care as the scroll. If it’s hand-cut, there’s a tiny living wobble to the stroke that proves a human was here. We like that.
Leave a comment
This site is protected by hCaptcha and the hCaptcha Privacy Policy and Terms of Service apply.